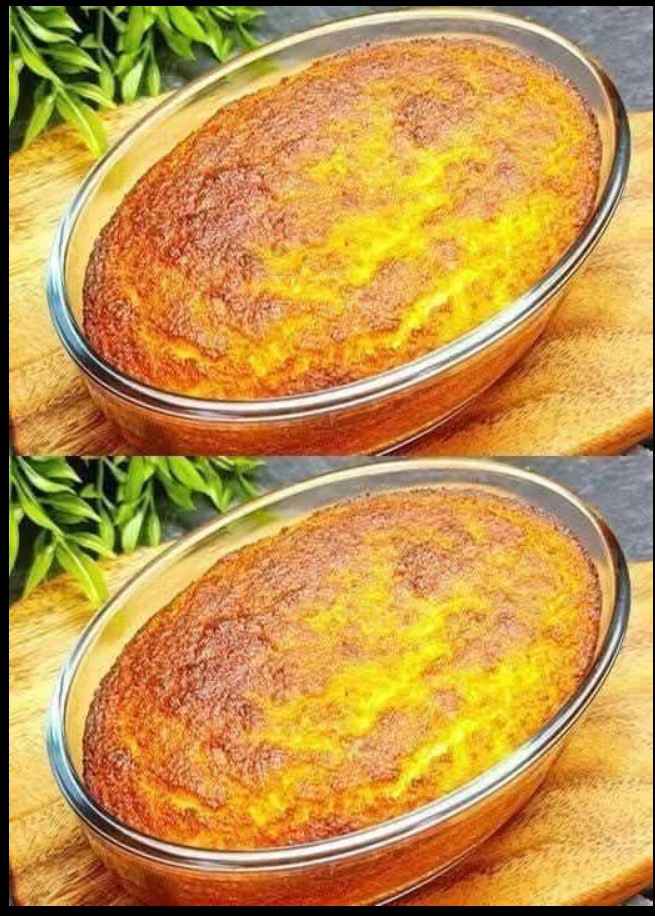
Some desserts exist to impress. Some exist to be made when the craving hits and patience is in short supply and the idea of standing over a mixer for forty minutes sounds like entirely too much to ask of an otherwise reasonable Tuesday evening. This coconut cake belongs firmly in the second category — and it is the kind of recipe that will make you question why you ever spent more time on a cake than strictly necessary. The preparation takes five minutes. The result is a soft, moist, deeply coconut-flavored cake that tastes tropical and indulgent and nothing at all like something that required minimal effort to produce. It is the kind of cake that people ask about after eating it, and the kind of answer you can give with a completely straight face: yes, it really is that simple.
Advertisement
The secret to making a coconut cake this quickly and with this few ingredients is canned coconut milk — the full-fat kind used for cooking and baking, not the refrigerated beverage version, which contains mostly water and will not produce the same result. Full-fat canned coconut milk contains a high proportion of coconut fat that performs the same structural and moisture-retaining functions in a cake that eggs, butter, and milk typically perform together. When combined with self-rising flour and sugar and a generous amount of shredded coconut, it produces a cake batter that comes together in one bowl with no mixer required and bakes into something with a genuinely tender, moist crumb that holds together perfectly and carries real coconut flavor all the way through. No eggs, no butter, no oil, no dairy — and no way to tell from the result that any of those things are missing.
Ingredients
1 and a half cups self-rising flour — if you do not have self-rising flour, make your own by combining 1 and a half cups all-purpose flour with 2 and a quarter teaspoons baking powder and half a teaspoon of fine salt, whisked together
Three-quarters cup granulated sugar — coconut sugar works as a substitute and adds a pleasant caramel undertone to the flavor
1 can (13.5 to 14 ounces) full-fat canned coconut milk — shake the can well before opening to ensure the coconut cream and liquid are fully combined; do not use the refrigerated carton type
Three-quarters cup finely shredded dried coconut, sweetened or unsweetened depending on your preference for sweetness — finely shredded rather than large flakes, which blend more evenly into the batter
1 teaspoon pure vanilla extract (optional but recommended)
Half a teaspoon coconut extract (optional, for an intensified coconut flavor)
For a simple topping: a generous handful of shredded or flaked coconut, lightly toasted in a dry pan until golden, is the most traditional and most beautiful finish. For a more substantial topping, a simple coconut glaze made by whisking three tablespoons of powdered sugar with one to two tablespoons of coconut milk until smooth is excellent. For a more indulgent finish, a whipped cream topping or a cream cheese frosting thinned with a little coconut milk pairs perfectly with the cake’s flavor profile.
Instructions
Step 1: Prepare the Pan and Oven
Preheat your oven to 350 degrees Fahrenheit (175 to 180 degrees Celsius). Grease a 7-inch or 8-inch round cake pan generously with a little coconut oil or neutral vegetable oil, then line the bottom with a circle of parchment paper for completely effortless removal. If you do not have parchment paper, dust the greased pan lightly with flour instead. A springform pan makes unmolding particularly easy if you have one available.
Step 2: Mix the Batter — All 5 Minutes of It
In a large mixing bowl, combine the self-rising flour and sugar. Whisk them together briefly to distribute evenly. Pour in the canned coconut milk (shake the can well first) and add the vanilla extract and coconut extract if using. Stir with a wooden spoon or spatula until the batter just comes together and no dry flour streaks remain visible. Add the finely shredded coconut and fold it gently into the batter until evenly distributed throughout. The batter will be relatively thick and pourable. The most important instruction at this stage is the same one that applies to almost every quick bread and cake recipe: do not overmix. Stir only until the ingredients are incorporated — overmixing develops gluten and produces a tough, dense cake rather than the tender, fluffy crumb you are aiming for. A few small lumps in the batter are completely fine and will bake out.
Step 3: Bake
read more in next page